ASDM (Adaptive Security Device Manager) is an application that allows you to configure and monitor Cisco ASA Firewalls. In this tutorial, we will discuss and configure the Cisco ASA Firewall for initial ASDM access. Let’s start the discussion on ASDM and Cisco ASA.
Introduction to Cisco ASDM (Adaptive Security Device Manager)
ASDM is an application that helps us to configure and manage Cisco ASA devices. It works on JAVA, so you must install it on your system.
It is a cross-platform application available for Windows, Linux, and macOS.
Cisco ASA Configuration for ASDM Access
I assume the Cisco ASA is either a new or a factory default device with no configuration. So, you must have serial console access to configure your Cisco ASA Firewall. Once you have CLI access to the firewall, you need the following configuration on Cisco ASA.
Check the ASDM image on the Cisco ASA Firewall:
show flash:
--#-- --length-- -----date/time------ path
23 0 Jul 21 2016 09:26:56 use_ttyS0
27 4096 May 30 2021 14:17:16 smart-log
28 2768 May 30 2021 14:17:46 smart-log/agentlog
24 4096 May 30 2021 14:16:14 log
26 0 May 30 2021 14:16:14 log/asa-appagent.log
61 4096 May 30 2021 14:17:22 coredumpinfo
62 59 May 30 2021 14:17:22 coredumpinfo/coredump.cfg
69 25819140 May 30 2021 15:10:27 asdm-76157.bin
The last entry in the output is the image of ASDM.
If you don’t have an ASDM Image, you can download it from the Cisco official website. However, you must have a valid service contract with Cisco to download ASDM.
Once you have the Cisco ASDM Image, upload it to Cisco ASA Flash via TFTP. Now, execute the below command on Cisco ASA to use a specific ASDM image.
ciscoasa(config)#asdm image disk0:/asdm-731.bin
The next step is to configure the management interface of Cisco ASA.
Configuring the Management Interface of the Cisco ASA Firewall for Management Access including ASDM
Now, we will configure the Cisco ASA Firewall’s management interface. Since this interface is used to manage the device, it is a trusted interface. I’ll assign a security level of 100.
ciscoasa# configure terminal
ciscoasa(config)# interface management 0/0
ciscoasa(config-if)# ip add 192.168.100.15 255.255.255.0
ciscoasa(config-if)# nameif mgmt
ciscoasa(config-if)# security-level 100
ciscoasa(config-if)# no shutdown
I’ve configured the security zone name mgmt. However, you can define this per your requirements.
Enabling the HTTP access for ASDM
Once you have configured the management interface, enable HTTP access for ASDM. So, you need to execute the below set of commands:
ciscoasa(config)# http server enable
We can restrict the network and interfaces that can access the Cisco ASA Firewall using ASDM. This will help secure management access to the firewall. After executing the below command, users with IP addresses from the 192.168.100.0/24 subnet can access the device.
ciscoasa(config)# http 192.168.100.0 255.255.255.0 mgmt
Now, we need to define the users who need to get into Cisco ASA. So, let’s continue.
Configuring the Username and Password on Cisco ASA
To log into the Cisco ASA firewall, we will configure the user account on the Cisco ASA Firewall. You can use your Local User Database or any AAA server such as Radius, TACACS+, or LDAP. In this example, we will use the Local database to log into Cisco ASA.
To create a local user account, you need to execute the below command:
ciscoasa(config)# username iptrainer password iptra!ner privilege 15
If you want to use any other authentication method, you can configure the firewall to check the credentials with an external server. If you continue with Local credentials, you don’t need to execute the below command.
Below is an example of an external AAA server.
ciscoasa(config)# aaa authentication http console <AAA-SERVER-NAME>
We just finished configuring the Cisco ASA Firewall. Now, it’s time to run the Cisco ASDM on your machine.
Running the Cisco ASDM on a Windows Machine
As discussed earlier, the ASDM application can run on top of JAVA. So, you need to install the JAVA before running ASDM. If you don’t have JAVA installed in your system, go to Oracle’s Java website and install Java.
Once you install Java, you can browse the Cisco ASA firewall’s management IP address and log in with defined credentials.
You might get Certificate Error Warning. It is because of self-sign certificate. It is safe to click Continue to this website.
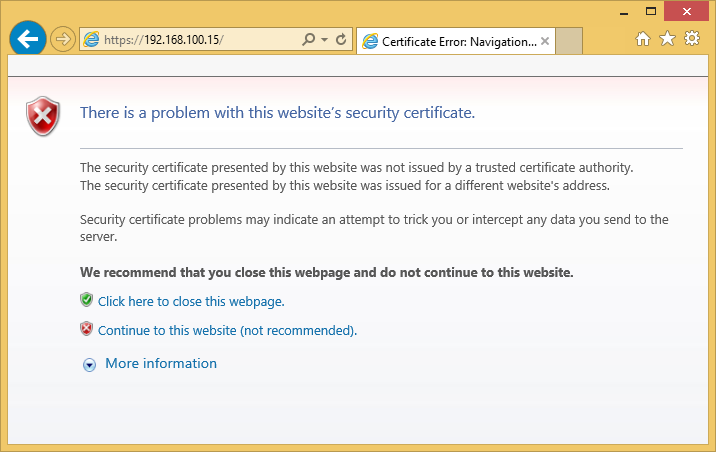
Click on Continue to this website. You will get an ASDM page.
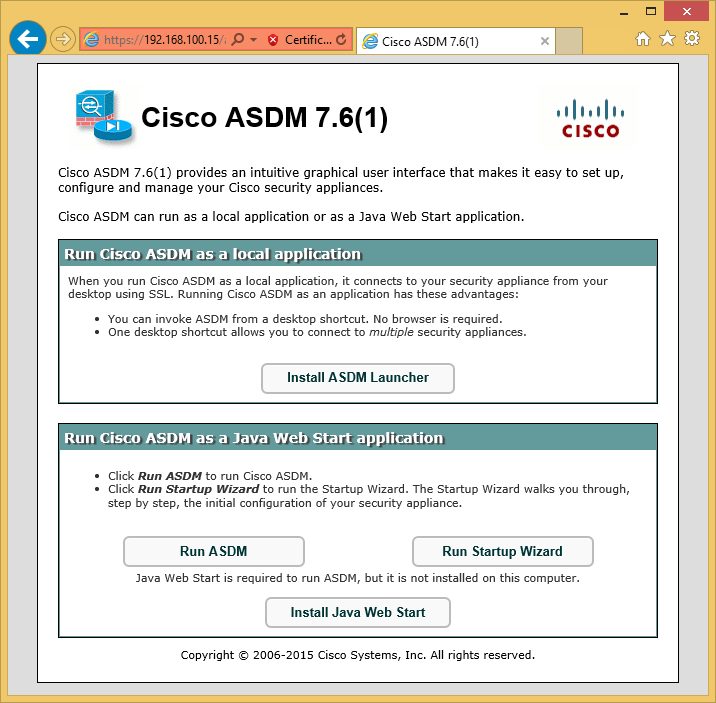
Now, click on Run ASDM. The self-signed certificate will cause warnings, but there is no risk in accepting all of them. ASDM will then ask for login credentials, which are the same credentials that we created earlier.
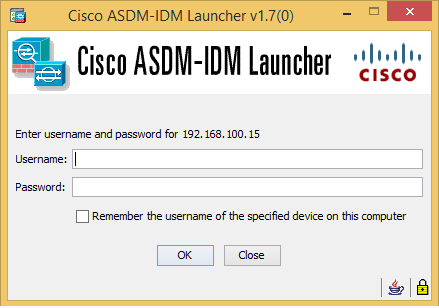
Once you log in with valid credentials, you will get the ASDM Dashboard.
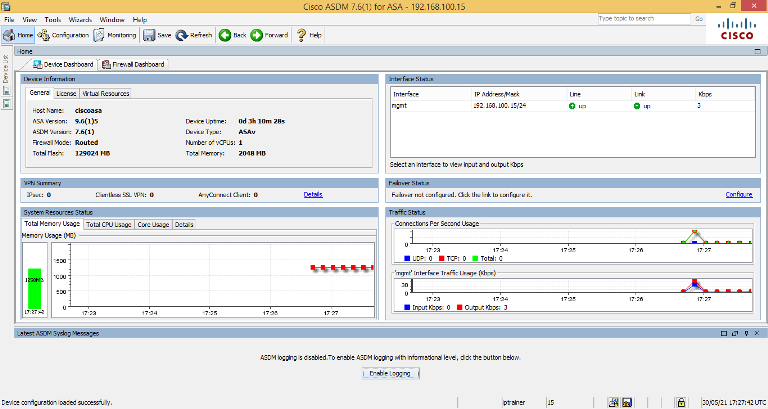
That’s it! We have successfully logged into the ASDM console.
Related Articles
- Cisco ASA Firewall – Hairpin or U-turn NAT
- Cisco ASA: Security Levels and Zones Explained
- pfSense Firewall Quick Overview | Getting Started with pfSense
- Enable Telnet and SSH access to the Cisco ASA Firewall
- How to configure Static Routes on Cisco ASA Firewall
- Cisco ASA Configuration Backup using SCP, TFTP, and ASDM
- Cisco ASA Firewall Interview Questions and Answers
- How to configure High Availability in Palo Alto Networks Firewall
- How to add Palo Alto Networks Firewall into Panorama
Summary
We have discussed Cisco ASDM, a feature-rich, Graphical User Interface application that Cisco offers to manage and monitor Cisco ASA Firewalls. We configured the Management Interface, HTTPS Server, and Logging credentials on the Cisco ASA Firewall. Finally, we get ASDM Access on the Windows machine. However, Java Runtime is required on the client machine while accessing Cisco ASA using ASDM.
I hope you like this article. Please share it on different social platforms! If you encounter an error, comment in the comment box and we will help you!